
Quick Start
This guide walks through creating a project, connecting models, uploading a document, and verifying knowledge-based answers in the agent workbench. You may use an existing organization and project. Page labels may differ by interface language and deployment.
Prerequisites
Access to the target environment's console and the organization permissions needed to create or configure a project.
Valid model provider credentials and access to a chat model and an embedding model. Available models and costs depend on the provider and deployment.
A text file that you are allowed to upload. All names below are examples; use the actual identifiers displayed after creating your project and knowledge base.
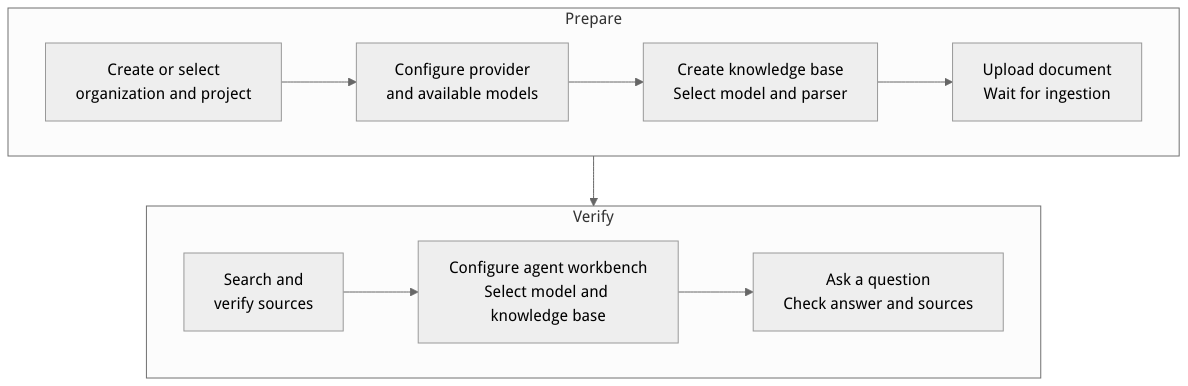
Workflow diagram, not a runtime screenshot.
View the flow diagram in full size
1. Create or select a project
Sign in to the target console, create or select an organization, and create or select a project. Record its actual project ID and region for subsequent requests.
The project root opens the platform registration page at
/overview/platforms. The separate/get-startedproject guide offers platform and server-side integration options.To call a client SDK from a browser application, register its actual domain on the project's platform page. Browser platform registration is not required for the server-side check in this guide.
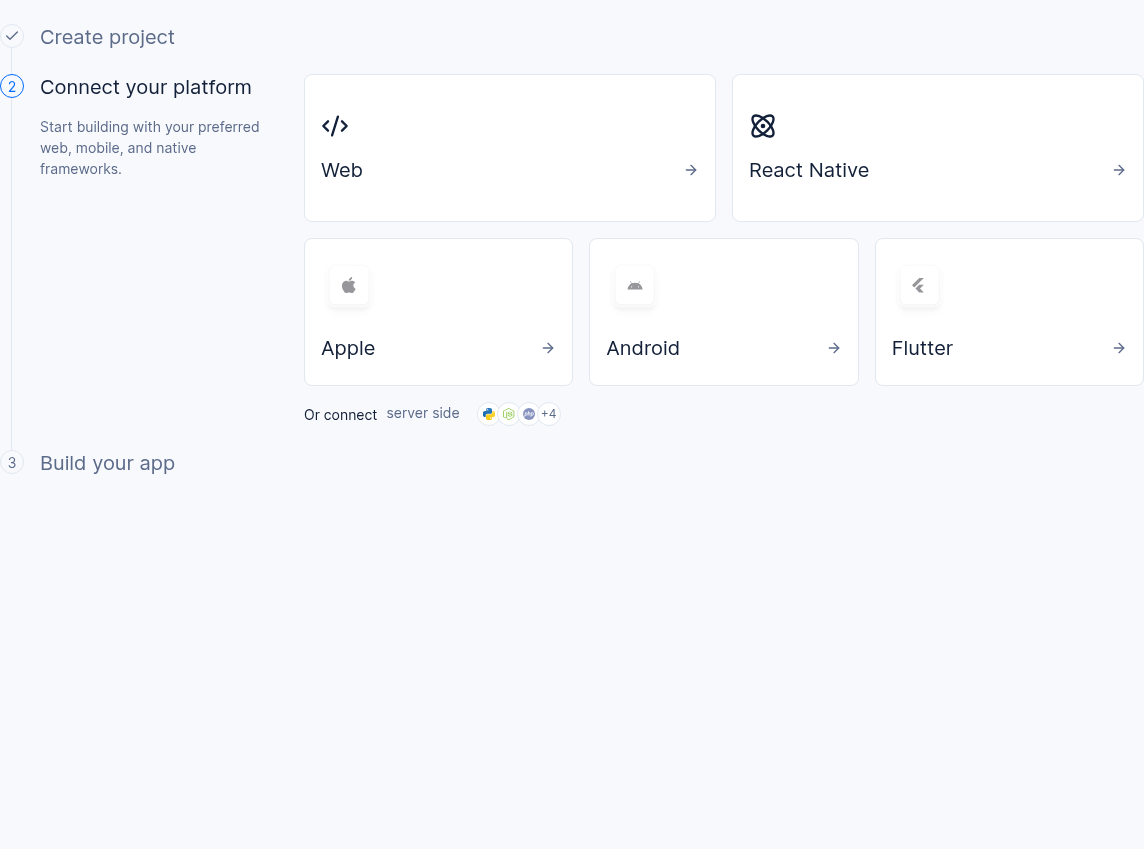
Figure: Project guide in a 2.12.0 environment. Available options depend on the deployment.
2. Configure models
Open Models in the project and add a model provider. You can select the Alibaba Cloud Bailian (DashScope) preset or another provider supported by your deployment.
Enter the provider credentials and connection settings, then enable a chat model and an embedding model that your account can use. A name appearing in the catalog does not guarantee that your account has access to it.
The console generates the provider identifier; the connection name identifies the configuration. Record the actual configuration and select the models by name later.
3. Create a knowledge base and upload a document
Open Knowledge Base, create a knowledge base with a name and optional description, and select an available embedding model. The console generates the knowledge base identifier. The embedding model cannot be changed after creation, and its dimension must match the model's actual output.
Select a parser appropriate for the file. The default
documentParserisvlm, which requires an availablevisionModel; for suitable plain text files you can selecttext. Parser capabilities and results differ.Open the knowledge base's Documents page and upload your test file. Ingestion after upload is enabled by default; if you turn it off, start ingestion from the document list. Wait until both the document and ingestion job are ready (
ready) before searching.In Search, ask a question that the document can answer and compare the returned excerpts and sources with the original. To use a lexicon, create it on the project lexicons page and bind it in knowledge base settings. A lexicon is optional for this guide.
For example, upload a text file containing “The project can search internal documents through a knowledge base.”, then ask “How can the project search internal documents?”. Results depend on the actual model, document, and index state.
4. Verify the agent workbench
Open the Agent Workbench. On first use, follow the page prompt to enable or initialize it.
Select an available chat model and configure the prompt as needed. In the knowledge base selector, select the knowledge base you created, close the selector, and turn on Knowledge Search. The configuration saves automatically; wait for the saved indication.
Send a question that the test document can answer, inspect the final response, and open any source shown to inspect its cited excerpts. To view the original document, return to the knowledge base search page. If the result is unexpected, first check the document state and retrieved excerpts.
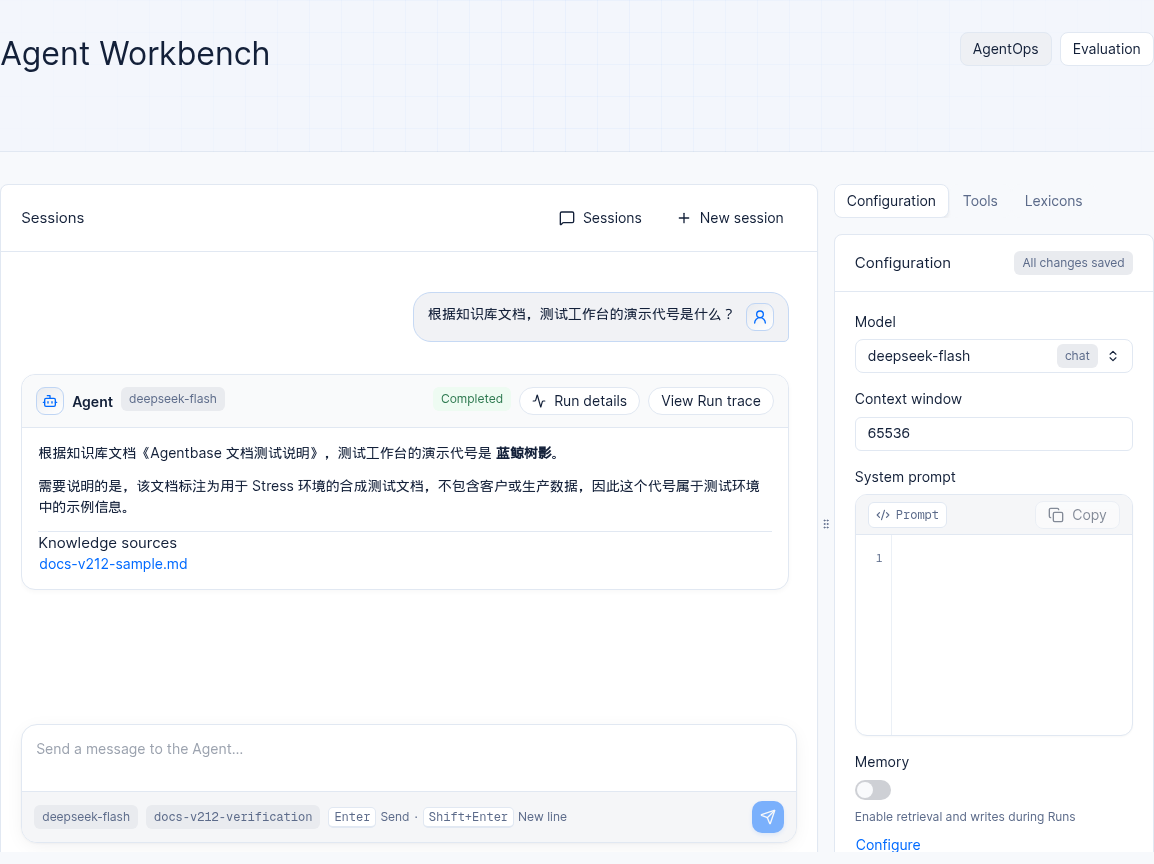
Figure: A Chinese question and answer using a synthetic document in a 2.12.0 test project.
Responses and citations depend on the model, retrieved results, and configuration. Reading workbench configuration verifies only the configuration endpoint, not an actual conversation.
5. Optional: verify server APIs
Create a project-level server API key on the project overview's API keys page. To check only the user list below, grant users.read; reading /v1/agent-runtime/project/config additionally requires agent-runtime.project. Grant only the scopes needed for your use, and never put a server key in browser code or commit it to a repository.
Set the actual endpoint and project ID in a local terminal. Interactive entry keeps the key out of common shell history; do not record your terminal input or print the key.
APPBASE_ENDPOINT="https://your-agentbase.example.com/v1"
APPBASE_PROJECT_ID="your-project-id"
read -r -s -p 'API key: ' APPBASE_API_KEY
printf '\n'
Check the public service version:
curl -sS -w '\nHTTP %{http_code}\n' "${APPBASE_ENDPOINT}/health/version"List project users. The key is passed through standard input rather than expanded into curl arguments. An empty user list is a valid result.
(
  set +x
  set -o pipefail
  builtin printf 'X-Appwrite-Key: %s\n' "$APPBASE_API_KEY" | \
    curl --disable --header @- -sS -w '\nHTTP %{http_code}\n' \
      -H "X-Appwrite-Project: ${APPBASE_PROJECT_ID}" \
      "${APPBASE_ENDPOINT}/users"
)
unset APPBASE_API_KEY
These commands retain error response bodies. If a request fails, check the status code and response message, target environment, project ID, key expiry, and scopes. Do not share requests or logs containing the key.
Troubleshooting
A model cannot be selected or called: Check that the provider is enabled, credentials and quota are valid, and the model is available to your account.
A document is not ready: Check whether ingestion was started, whether the parser suits the file, and whether the embedding and vision models are available. Inspect the failure details before retrying.
No relevant results: Confirm that the document and ingestion job are ready, inspect the chunks and question, and check that the knowledge base is attached to the workbench.
An API returns an authorization error: Confirm that the key belongs to the current project, has not expired, and has the required scopes for the endpoint.